
A Hitchhiker's Guide to Installing Arch Linux
October 1, 2023 (2 years ago)Have you ever been in a tech-savvy conversation and heard someone casually drop the line, "I use Arch Linux, by the way"?

It's almost like a badge of honor in the Linux world—a symbol of elite knowledge and unyielding determination. You might have found yourself intrigued, even envious, and thought, "I want to be that person."
But, there's a catch, right? A certain mystique around Arch Linux, an aura of complexity, and an infamous reputation for having the steepest learning curve in the Linux ecosystem. The thought of diving into the Arch Wiki might send shivers down your spine, and you're not alone in feeling this way. In this blog I am going to help you out installing arch...
This is just a guide to minimal arch install, in the upcoming blog I will explain how to setup a desktop profile
Boot into the live environment
Visit the official archlinux page and download the ISO. After that burn that into any USB using any tool depending on which environment you are. Next boot into it...
Connecting to the internet
The next challenge is connecting to the internet. To connect to the internet we are going to use the iwctl utility. Type the command to start the interactive utility. After that use device list command to display the available WiFi interfaces on your system. Use station wlan0 scan then station wlan0 get-networks to display available netowrks. To connect to one use station wlan0 connect REPLACE_WITH_SSID to connect to that network.
If you had a ethernet connection you can skip this.
Doing the partitons
Its time to create the partitons!! In the arch wiki they preferd to use fdisk to that, but we will use cfdisk. When you enter the command you will get some similar output:
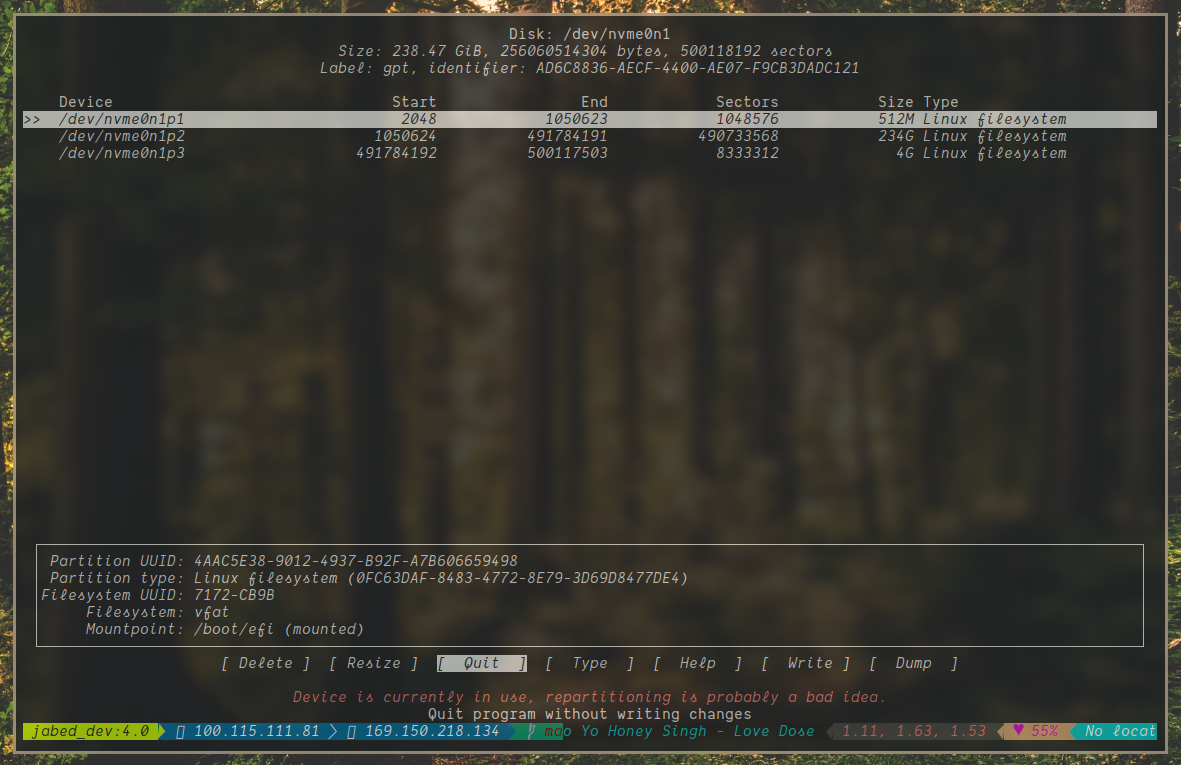
Delete all the prevoius partitons and make four partitons for swap, boot, root and home. I prefer making a separate home partiton cause if system is to be upgraded or reinstalled, can be done without affecting user data. Now for boot give it 512M and swap of 4G. Now for the root and home its acording to you. Give your home partiton more space. Now its time to format all of them.
Use the command lsblk to see the partiton labels.
Format the root and home with ext4 format. It can be done this command:
mkfs.ext4 /dev/your_root_partition
mkfs.ext4 /dev/your_home_partition
For the efi one, we have to format it with FAT 32 format:
mkfs.fat -F 32 /dev/your_boot_partitonLastly for the swap:
mkswap /dev/your_swap_partitionMounting the partitons
Create two new directory (one if you skippped creating a single root partiton) namely /mnt/home and /mnt/boot/efi
We then mount the partitons
mount /dev/your_root_partition /mnt
mount /dev/your_boot_partiton /mnt/boot/efi
mount /dev/your_home_partition /mnt/home # if yjou made a seperate home partiton
Turn on swap with swapon /dev/your_swap_partition
Use lsblk to verify if you did it correctly
Installing
Now we are going the install base, linux and linux-firmware. For the modern sound cards we need the sof-firmware also. For the text editor we will use neovim. We also need NetworkManager. We will install them with this command:
pacstrap /mnt base linux linux-firmware sof-firmware neovim NetworkManagerConfigure the system
Run the command genfstab -U /mnt >> /mnt/etc/fstab to automatically generate and append filesystem information to the /etc/fstab
Chrooting into the newly installed system
Run arch-chroot /mnt to chroot into the newly installed system. Now we will set the locale, timezone, user, etc.
To the set the timezone, run:
ln -sf /usr/share/zoneinfo/Region/City /etc/localtimeNow sync it with the system clock with hwclock --systohc
Edit /etc/locale.gen and uncomment en_US.UTF-8 UTF-8 and other needed UTF-8 locales. Generate the locales by running locale-gen. Create the locale.conf file, and set the LANG variable accordingly.
# /etc/locale.conf
LANG=en_US.UTF-8
Now lets give our new beast a name. Edit the /etc/hostname to give your system a name.
Set the root password with the command 'passwd'.
Now lets create a user... Run:
useradd -m -G rig -s /bin/bash jabed # replace with your name
passwd jabed # to set the passwd
Now lets promote the new user to be a superuser. Run:
EDITOR=nvim visudo
Now scroll and uncomment the line with the group we created rig
Now the last thing is to enable the NetworkManager daemons, run the command systemctl enable NetworkManager to enable it.
Installing the bootlaoder
Now we need a bootloader for our system. In this guide, we will install GRUB. Firstly lets the install the dependencies:
pacman -S grub efibootimgrNext, lets install it:
grub-intsall /dev/your_disk
grub-mkconfig -o /boot/grub/grub.cfg
WE ARE DONE!!!
Unmount all the partitons with unmount -a and reboot the system.
CROSS FINGERS and you are into your system!!!
Now you can also become the I USE ARCH BTW guy!! Congrats!!!