Port Forwarding with Cloudflare Tunnel
May 30, 2023 (2 years ago)Exposing your ip address to the public to forward ports is a bad idea. It's a security risk and it's not very convenient. With cloudflare tunnel you dont need to punch holes in your firewall or expose your ip address to the world. You can forward ports to your local machine without exposing your ip address to the world.
Yes this can be done with the help of cloudflare tunnel
What is Cloudflare Tunnel?
Cloudflare Tunnel is a service that allows you to expose your local web server to the internet without exposing your ip address to the world. It's a secure way to expose your local web server to the internet.
How does it work?
Cloudflare Tunnel works by creating a secure connection between your local machine and cloudflare's edge network. It uses TLS to encrypt the connection between your local machine and cloudflare's edge network. It also uses TLS to encrypt the connection between cloudflare's edge network and the internet.
Lets see how it works in action by forwarding one of my local web server to the internet.
In this example I am going to forward port 8080 of my host machine to the internet.
Step 1: Get your cloudflare account
If you dont have a cloudflare account you can create one here. And you must have one if you are reading this article. Cloudflare is not sponsoring me to say this.
Step 2: Get you Domain name
If you dont have a domain name you can get one from here or any other domain name provider and add cloudflare nameservers to your domain name. So that you can manage your domain name from cloudflare dashboard.
Step 3: Activate Cloudflare Zero Trust
AHHMMM... You need a credit card to activate cloudflare zero trust. Select your suitable plan and activate it.
Step 4: Creating a new tunnel
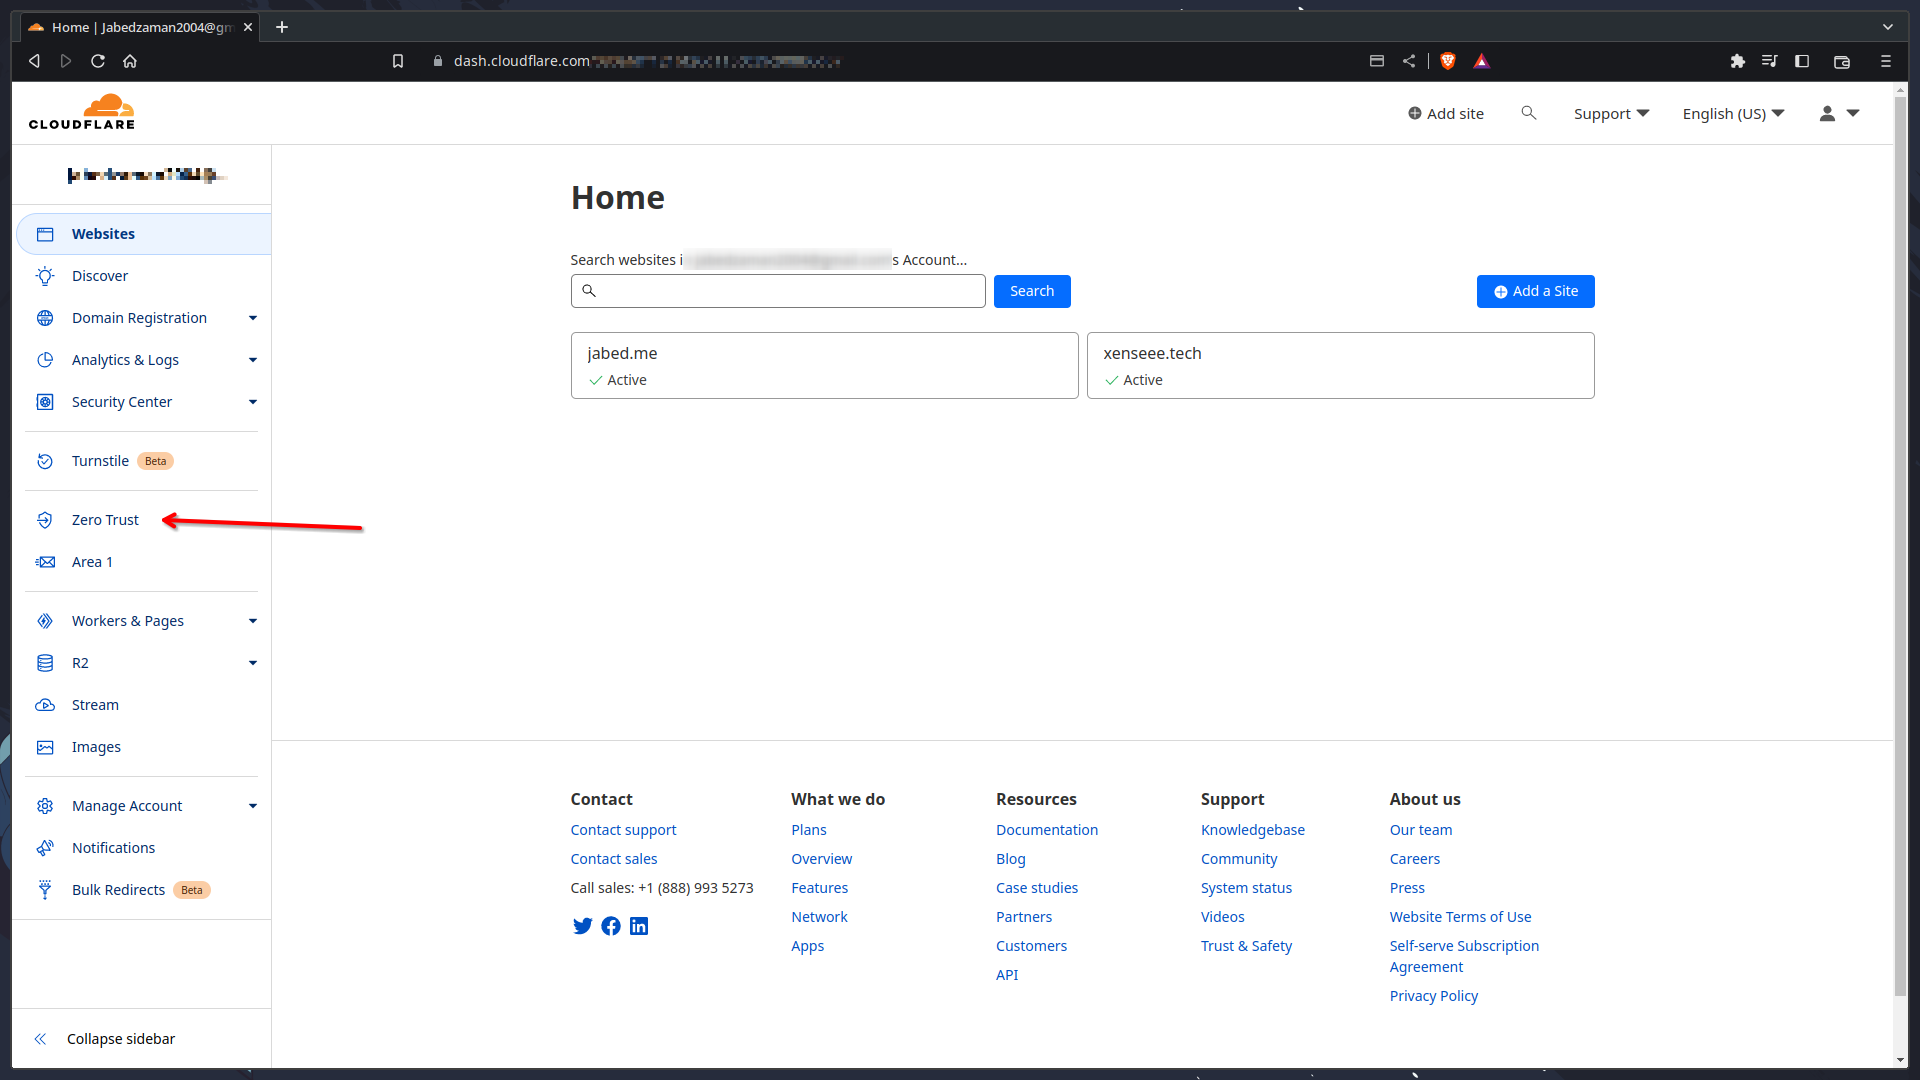
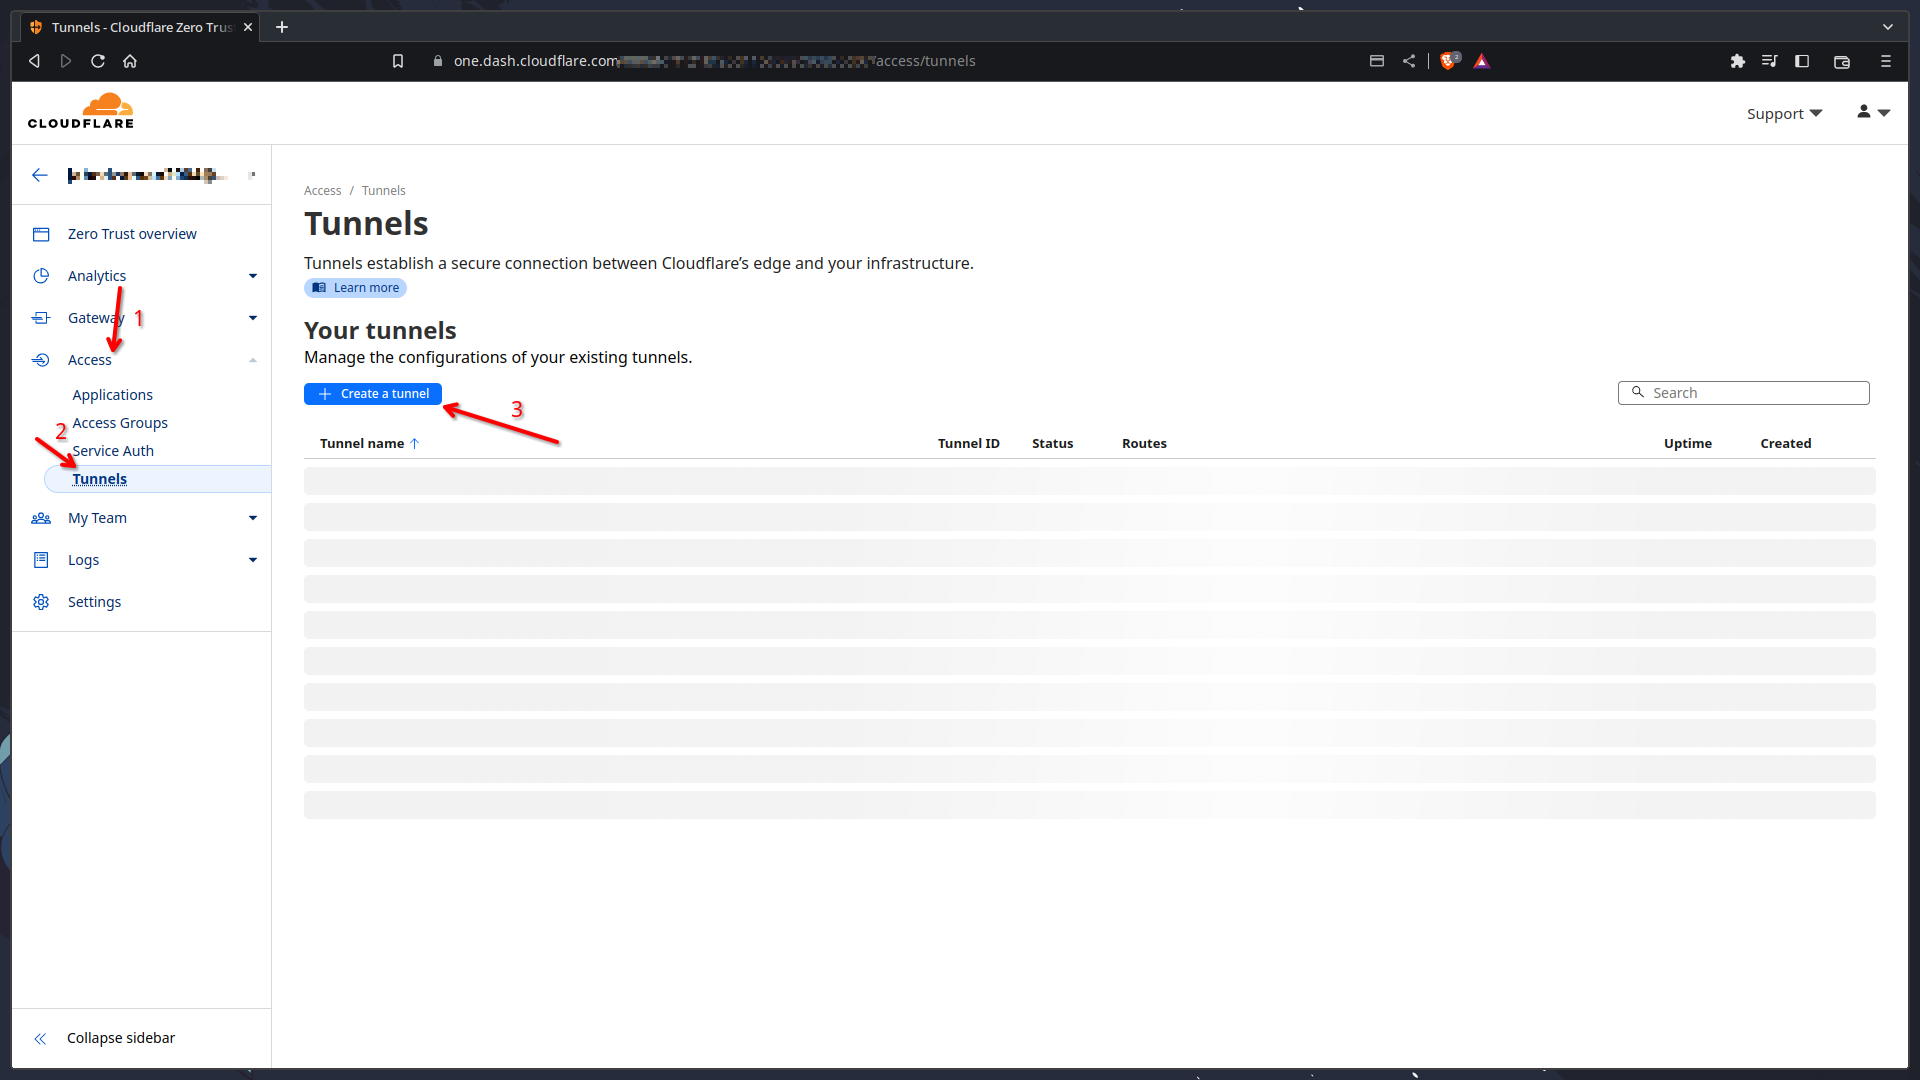
From the cloudflare dashboard select Access from the side menu and move to Tunnel
Click on New Tunnel button to create a new tunnel.
Things may look different in the future.
Step 5: Connecting to the tunnel
After giving a name to your tunnel you will be presented with a command to connect to the tunnel. Copy the command and run it in your terminal.
I would prefer docker, the bad boy of the container world. And yeah you need to add a -d flag to run it in the background.
docker run -d cloudflare/cloudflared:latest tunnel --no-autoupdate run --token <your-secret-token>Step 6: Forwarding the port
Time to configure. Keep the settings as this and click on Next
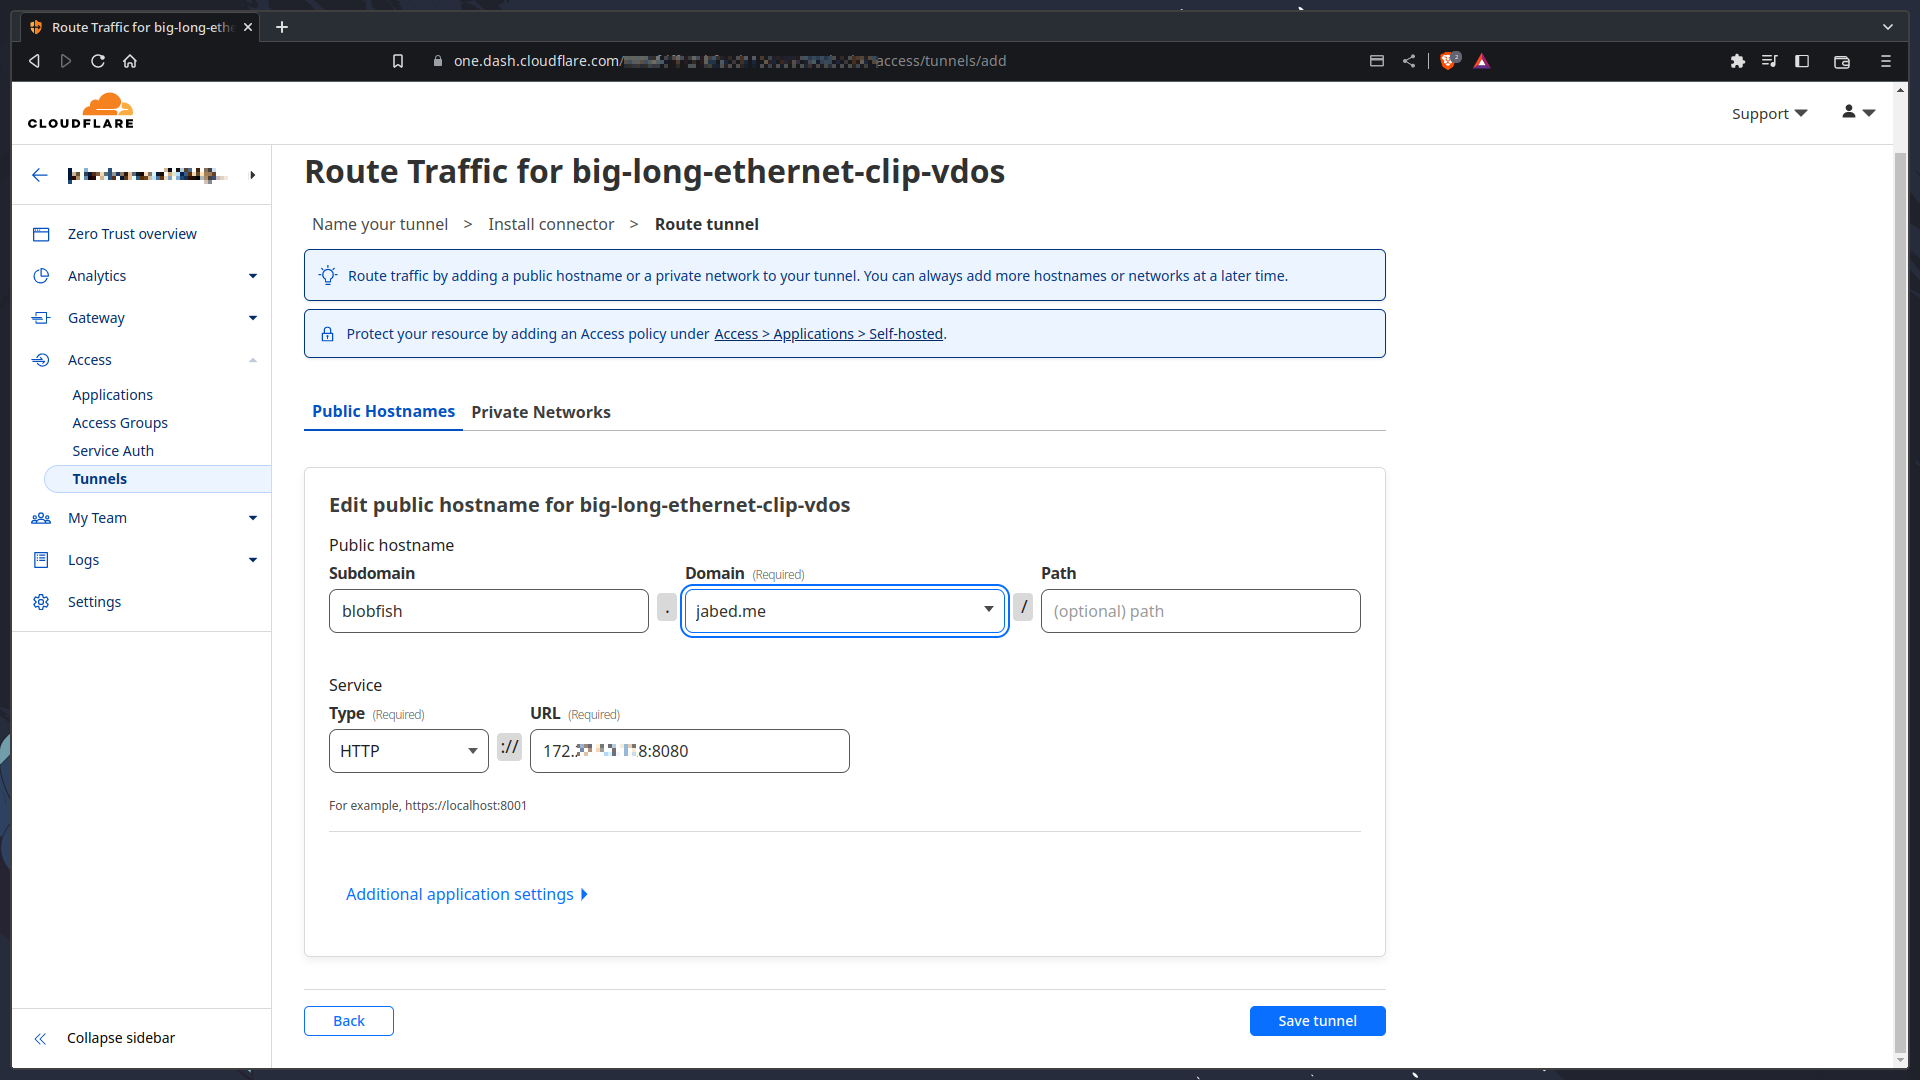
Add the domain which you earlier added to cloudflare. On the Service section keep, enter the url as <your-ip-address>:<port-you-want-to-forward>
BINGO!! You have just forwarded a port to the internet without exposing your ip address to the world. Kinda was a sort of reverse proxy.